Solar-powered security cameras can monitor a driveway, garden gate, or remote shed without a nearby power outlet. Their performance still depends on sunlight, battery capacity, wireless coverage, and careful placement. A shaded eave may look convenient, but it can leave the panel undercharged through several cloudy days. Small details matter. This guide explains How To Install Solar Powered Camera equipment in 2026, from checking the package and choosing a mounting point to testing the live view. It focuses on practical steps, not promises of uninterrupted recording.
Before drilling, compare the camera’s instructions with the site conditions. Check the manufacturer’s weather rating, recommended panel angle, mounting hardware, and operating temperature range. Test the Wi-Fi signal where the camera will sit, then confirm that the solar panel receives direct light for several hours. A phone’s signal bars are only a rough guide. Use the camera app’s connection test when available. Mount the unit firmly, keep the lens clear of branches, and aim it at the area you actually need to observe. Do not point it toward a busy road or a neighbor’s windows. After installation, review motion alerts and recorded clips during both daylight and darkness. Adjust sensitivity if leaves, headlights, or small animals trigger repeated alerts. Solar setups are not maintenance-free; dust, snow, and seasonal shade can reduce charging. A good installation is usually less about drilling quickly and more about checking the site twice. Even then, the first position may need a small adjustment.
Before choosing a panel, estimate the camera’s daily energy use. Daily Wh equals standby Wh plus recording Wh, with each mode counted for its actual hours.
For example, a camera drawing 1.2 watts in standby for 22 hours uses 26.4 Wh. At 4.5 watts while recording for two hours, it uses another 9 Wh. That is 35.4 Wh per day.
These periods must not overlap, or the estimate double-counts energy. Small detail, big difference.
Measure power at the camera if possible; manufacturer ratings may not match night use, weak signal, or frequent motion alerts. A plug-in energy meter can reveal the real draw over several days.
NREL’s PVWatts documentation uses a default 14% system-loss assumption for its estimates. Treat that as a planning reference, not a guaranteed loss figure for a small off-grid setup. Wiring, charge controllers, and shade can change results.
Then compare your daily Wh estimate with local sunlight. NREL’s National Solar Radiation Database provides location-based solar-resource data, which is more useful than assuming every site gets the same sun.
Allow extra battery capacity for cloudy days and winter conditions.
I would still test the camera for a week before finalizing panel size; motion activity can be oddly uneven, and one quiet day tells you very little.
Estimate the camera’s real daily energy use before choosing a panel. Check its average power draw, including night vision, wireless connection, and any motion-triggered features. Multiply average watts by 24 hours to get watt-hours per day. Small loads add up. If the camera averages 8 watts, it needs about 192 watt-hours daily.
Find the local peak-sun hours for the installation location, preferably for the least sunny season you expect it to operate. These are equivalent full-sun hours, not total daylight. Then allow for losses from heat, wiring, panel angle, dust, and charge control. A planning factor of 0.75 is a reasonable starting estimate, though real systems vary. The basic calculation is daily watt-hours divided by peak-sun hours and the loss factor. At four peak-sun hours, 192 watt-hours requires about a 64-watt panel. On paper, that is.
Choose a panel with some extra capacity rather than matching the calculation exactly. Recheck the result against winter shade, nearby branches, and the panel’s actual orientation. A sunny afternoon can make a weak setup look fine. A spreadsheet can also be wrong if the camera’s power draw changes at night. Measure consumption over several days when possible, and size the battery separately for cloudy periods.
An IP66 rating under IEC 60529 describes protection against dust and powerful water jets. It does not mean a camera can be submerged or safely pressure-washed. Check the camera’s documentation to confirm its enclosure carries this rating; a sheltered mounting spot cannot make a lower-rated device weatherproof.
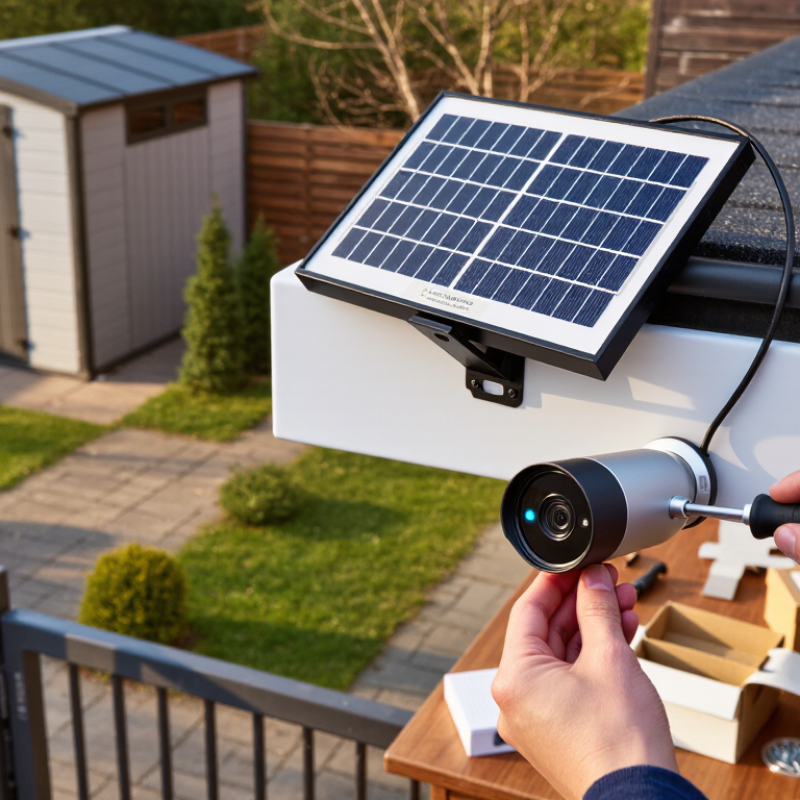
Choose a firm wall or eave with a clear view and several hours of direct sunlight for the solar panel. Avoid spots beneath dripping gutters, beside sprinkler heads, or where rainwater collects. Keep cable connections facing downward when the installation guide allows, and seal entry points with the specified fittings. A solid mount matters: loose brackets can shift in wind and spoil the camera’s view. I would still recheck the angle after the first heavy rain; small leaks and glare are easy to miss during installation.
Tips: Before drilling, check the view at dawn and dusk for glare. Leave room to clean the panel. Confirm the panel’s own weather rating, too; the camera’s IP66 rating does not automatically protect separate accessories. If a location looks convenient but stays shaded, it may not be a good solar mounting point.
How to Install a Solar Powered Camera in 2026
Mount the solar panel where it receives steady daylight, not merely where installation feels easiest. Check the spot at different times of day. A roof edge or leafy branch may cast a long shadow by afternoon. Keep the panel’s surface clear of gutters and other obstacles. Small changes in placement can matter.
Before connecting anything, read the camera and panel instructions carefully. Confirm their required voltage and permitted cable length. Do not assume that a plug fitting means the electrical specifications match. Too much cable can cause power loss, while an unsupported voltage may damage equipment. Follow the stated limits. If the manual is unclear, contact the manufacturer’s support team rather than guessing.
Secure the panel to a stable surface, then route its cable without sharp bends, tight pinches, or loose loops. Leave enough slack for the mount to move, but not enough for wind to tug the connector. Use only the weather-resistant fittings supplied or recommended for the equipment. Check that connections are fully seated before testing the camera. It is easy to rush this part. I might still recheck the cable after the first windy day; a neat installation can shift.
Before mounting the camera, connect your phone to a 2.4 GHz Wi-Fi network. The camera should support IEEE 802.11 b/g/n; a 5 GHz-only network will not work for pairing. Keep the camera near the router during setup, and check the network name and password carefully. Small typing errors are easy to miss. Follow the setup prompts, then wait for the camera to confirm its connection before choosing a permanent outdoor position. If pairing fails, move closer and verify that your phone has not switched to a different network.
Test charging and alerts before relying on the camera. Place the solar panel where it receives several hours of direct sun, then check the camera’s battery or charging indicator after installation. Shade from a roof edge can reduce charging, even when the spot looks bright. Give it time. Trigger a test alert by walking through the camera’s detection area, and confirm that a notification reaches your phone. Adjust the detection zone if passing cars or moving branches cause repeated alerts. Check again after a cloudy day; solar charging can vary, and one quick test does not prove the setup is dependable.
| How to Install a Solar Powered Camera in 2026 - Pair over 2.4 GHz Wi-Fi (IEEE 802.11 b/g/n) and Test Charging and Alerts | |||
|---|---|---|---|
| Step | Task | What to Check | Successful Result |
| 1. Confirm requirements | Check that the camera supports 2.4 GHz Wi-Fi and review its setup instructions, power requirements, and weather rating. | IEEE 802.11 b/g/n identifies common 2.4 GHz Wi-Fi standards. Router band support and security compatibility can vary by camera. | The camera, router, and installation location meet the device’s stated requirements. |
| 2. Choose a Wi-Fi location | Test the intended camera position with a phone or the camera’s setup app before mounting. | Walls, metal surfaces, distance, and interference can weaken a Wi-Fi signal. A 5 GHz connection alone will not meet a 2.4 GHz pairing requirement. | The setup app can connect reliably at the proposed camera location. |
| 3. Charge and prepare | Charge the camera as directed by its instructions. Keep the solar panel disconnected until the initial setup if the instructions recommend this. | Initial charging steps and battery indicators differ by model. Use the supplied or specified charging equipment. | The camera powers on and has enough charge to complete setup. |
| 4. Pair over 2.4 GHz | Open the camera’s setup app, select the 2.4 GHz network, enter the Wi-Fi password, and follow the pairing prompts. | Check the network name and password carefully. Some routers combine 2.4 GHz and 5 GHz under one network name; follow the camera’s pairing guidance if setup fails. | The app reports that pairing is complete and the camera appears online. |
| 5. Update and configure | Install any offered firmware update, set the correct time zone, and review motion-detection, recording, and notification settings. | Keep the camera connected to power and Wi-Fi during updates. Available features depend on the camera and service plan. | The camera shows the correct time and its basic settings are saved. |
| 6. Position the camera | Choose a stable mounting surface and aim the camera at the area to monitor. Follow the manufacturer’s mounting-height and viewing-angle guidance. | Check the live view for obstructions, glare, and unwanted views. Local rules may restrict recording areas where people expect privacy. | The intended area is visible, and the mounting point is secure. |
| 7. Place the solar panel | Mount the panel where it receives direct sunlight for as much of the day as practical, then connect it as instructed. | Shade from trees, roofs, or seasonal obstacles can reduce solar charging. Panel direction depends on hemisphere and site conditions; follow the panel instructions and adjust for local sun exposure. | The panel connection is secure and the panel is not persistently shaded. |
| 8. Test charging | Check the app’s battery or charging status before and after a period of daylight, using the camera’s normal reporting method. | Charging speed depends on sunlight, panel placement, battery state, camera activity, and weather. A single short check may not show a noticeable battery increase. | The app or device indicates solar input or charging when conditions and the model allow it. |
| 9. Test motion alerts | Enable notifications, walk through the monitored area, and check the app for an alert or recorded event. | Allow notification permissions on the phone. Adjust motion sensitivity or detection zones if alerts are missing or triggered by unwanted movement. | A test movement produces the expected notification or event recording. |
| 10. Check operation | Review the live view, Wi-Fi status, battery status, and recent events after installation. | If the camera is offline, check 2.4 GHz network availability, signal strength, password accuracy, and power. If charging is not indicated, inspect the cable connection and sunlight exposure. | The camera remains online, the image is usable, and charging and alerts behave as expected. |
Multiply its average power in watts by 24 hours. An 8-watt camera uses about 192 watt-hours daily. Small loads add up.
It means equivalent hours of full sunlight, not total daylight. Use the local figure for the least sunny season you expect.
Divide daily watt-hours by peak-sun hours and a loss factor, such as 0.75. For 192 watt-hours and four peak-sun hours, the estimate is about 64 watts.
A little extra capacity can help account for heat, dust, wiring, and changing sunlight. The calculation is only a starting point.
Winter shade, branches, roof edges, and panel angle can all matter. Check the spot in the morning and afternoon.
Measure consumption over several days when possible, including nighttime use. Motion features can change the result. I would not trust one sunny afternoon.
Size it separately for cloudy periods. A suitable panel estimate does not tell you how much stored energy you need.
Confirm the required voltage and permitted cable length in the instructions. A plug that fits does not guarantee a match. Measure before guessing.
Use a stable surface, avoid sharp bends and tight pinches, and secure weather-resistant fittings. Leave enough slack for movement, but not enough for wind to tug the connector. I would recheck it after a windy day.
How To Install Solar Powered Camera systems begins with understanding how much energy the camera uses each day. Add standby power consumption to the energy used while recording to estimate daily watt-hours. Then choose a solar panel that can meet this demand using your location’s peak-sun hours, while allowing for system losses and less-than-ideal weather.
Select a secure mounting location with an IEC 60529 IP66-rated enclosure or installation setup suitable for outdoor exposure. Position the camera and panel for reliable coverage and sunlight, then mount them according to the manufacturer’s voltage and cable-length limits. After installation, connect the camera to a 2.4 GHz Wi-Fi network using IEEE 802.11 b/g/n compatibility. Finally, check that the battery is charging, test the camera’s view and connection, and confirm that motion alerts arrive as expected. These checks help ensure the system is positioned, powered, and communicating correctly.

Psennikow