How to Install a Solar CCTV Camera Step by Step

Time:2026-11-05 Author:Sophia
0%

Solar-powered CCTV can protect a gate, shed, or remote driveway without a nearby mains outlet. But dependable footage depends on more than mounting a camera and panel. The International Energy Agency reported that renewable capacity additions rose by almost 50% in 2023, reaching nearly 510 gigawatts; solar PV supplied about three-quarters of that growth (IEA, Renewables 2023). The figures show solar’s growing reach, not a guarantee that a small security camera will stay powered in every location. Fatih Birol, the IEA’s Executive Director, called solar “the new king of electricity markets.” That broader shift makes off-grid security more practical, but careful setup still matters.

This guide explains How To Install Solar Cctv Camera equipment step by step, from checking the camera’s battery and panel compatibility to testing its live view. You’ll learn how to choose a mounting point with a clear view, limit shade on the panel, and aim the lens before tightening the bracket. Small details matter. A roof eave can shade a panel at midday, while a weak Wi-Fi signal may leave clips slow to load. Check the manufacturer’s instructions for charging, weather resistance, and mounting limits; specifications differ between models. Then test motion alerts and recording before relying on the camera. One honest limitation: winter daylight and cloudy weather can reduce charging, even when installation looks neat. A careful test over several days can reveal problems early.
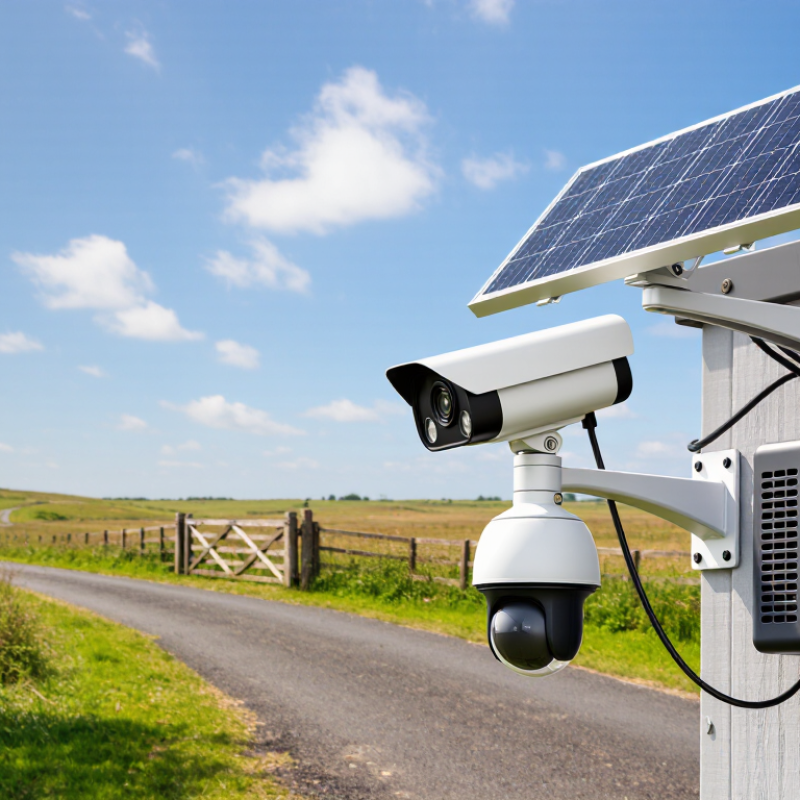
How to Install a Solar CCTV Camera Step by Step

Assess the Installation Site and Sunlight Exposure

Before drilling, inspect the site at different times of day. A spot that looks sunny at noon may sit in deep shade by mid-afternoon. Watch for shadows from roof eaves, chimneys, tree branches, fences, and nearby buildings. Check the camera’s position and the solar panel’s position separately; the best camera view may not receive the best sunlight. Take notes. Record when direct sun reaches each possible panel location, and repeat the check on a cloudy day if practical.

Consider seasonal changes, too. A bare branch may cast heavier shade once its leaves return, while winter sun travels lower and creates longer shadows. Small details matter. Look for a clear view of the area you need to monitor, but avoid placing the panel where it will be shaded for much of the day. Compare your observations with the camera’s stated charging requirements, since sunlight needs vary by device and local conditions. A compass direction alone cannot guarantee good exposure. If the site is borderline, test the panel in its proposed position for several days before fixing it permanently. I have found that this extra check can save a second trip, though weather still makes predictions imperfect.

Check the Camera, Solar Panel, and Required Tools

Before mounting anything, unpack the camera and compare its parts with the installation guide. Check the housing for cracks, loose seals, or moisture around the lens. Confirm that the battery charges and that the camera starts, connects to your network, and records a test clip. A live preview can reveal a blurry lens or a weak signal before the camera is out of reach. Small checks matter.

Inspect the solar panel for chipped glass, bent framing, and a clean cable connector. Confirm that its output is compatible with the camera, using the specifications in the guide rather than guessing from connector shape. Lay out the cable and check that it reaches the planned position without being stretched. Note where sunlight falls across the roof or wall; a spot that looks bright at noon may be shaded for much of the day. That detail is easy to miss.

Gather a drill, suitable fasteners, a screwdriver, a measuring tape, a pencil, and a level. Use fasteners suited to the mounting surface, and prepare a stable ladder if one is needed. Keep the instructions nearby, along with any seals or cable clips supplied with the equipment. Test-fit the parts on the ground first. It may feel slower, but discovering a missing bit after climbing is worse. Even a careful checklist can miss something, so pause and inspect the setup once more before drilling.

Mount the Camera and Position the Solar Panel

Choose the camera position before drilling. Check the live view for faces, gates, and useful approach paths. Keep it level. Avoid aiming directly at bright sky or reflective surfaces, which can wash out detail. Fasten the mounting plate to solid wood, masonry, or another suitable structural surface, using hardware rated for the location. A loose mount can shift in wind and spoil the viewing angle. Leave room to open the camera housing and reach its charging port. Seal any wall penetrations with weather-resistant material, and route the cable with a gentle drip loop so rain does not track indoors.

Place the solar panel where it receives unobstructed daylight for much of the day. Roof edges, branches, and seasonal leaf growth can cast longer shadows than expected. In the Northern Hemisphere, a generally south-facing position is a useful starting point; adjust for local conditions and the camera’s charging guidance. The National Renewable Energy Laboratory’s PVWatts documentation uses a 14% default system-loss assumption in its grid-connected solar estimates. That figure is not a camera-specific prediction, but it shows why panel placement and real-world losses matter. Before tightening every bracket, check the camera feed and panel exposure at different times. One imperfect detail: a spot that looks sunny at noon may be shaded by late afternoon. Recheck it.

How to Install a Solar CCTV Camera: Mount the Camera and Position the Solar Panel

Mount the camera securely with a clear view of the area you want to monitor. Position the solar panel in an unshaded spot and orient it toward the equator—south in the Northern Hemisphere or north in the Southern Hemisphere. The chart shows an illustrative clear-day output pattern; actual performance varies with location, weather, season, and panel angle.

Connect the Components and Configure the Camera

With the mounting bracket fixed, switch off the camera before connecting anything. Match the solar panel, battery, and camera ports by their labels, then check the connector polarity and voltage requirements in the device manual. Do not rely on wire color alone. Seat each plug firmly and protect exposed connections from rain. Aim the panel toward unobstructed daylight, but avoid placing it where eaves or branches cast moving shadows. A small shadow can reduce charging.

Power up and open the camera’s setup interface. Connect it to a trusted network, set the correct time zone, and install available firmware updates. Create a unique password, enable multifactor authentication if offered, and limit motion zones to the areas you need. Verizon’s 2024 Data Breach Investigations Report found that 68% of breaches involved a non-malicious human element; careful account setup matters. For solar expectations, NREL’s PVWatts documentation uses a 14% default system-loss assumption for standard PV estimates, not a guarantee for a small camera panel. Check the battery level after a full day, then review it again after cloudy weather. I would not call the setup finished yet. A loose connector can look like poor sunlight.

Test the System and Adjust the Camera Angle

How to Install a Solar CCTV Camera Step by Step
Test the System and Adjust the Camera Angle

After mounting the camera, check its live view, motion alerts, night vision, and recording playback. Walk toward the entrance from several directions. Confirm that faces remain visible and alerts arrive without long delays. Check it at dusk. A bright sky behind a visitor can turn a clear daytime image into a dark silhouette. NREL’s PVWatts documentation estimates solar output using location, panel tilt, orientation, and weather data. Compare the camera’s charging indicator on sunny and cloudy days; one afternoon is not enough to judge its solar performance.

Adjust the camera to cover the approach, not a wide patch of empty pavement. IEC 62676-4 uses DORI planning benchmarks of 25 pixels per metre for detection, 125 for recognition, and 250 for identification. These figures are useful targets, not a guarantee: lens choice, distance, motion, and lighting also affect detail. Then walk the approach. Review the footage at the distance where you need to recognize a visitor. A small angle change can matter more than extra coverage.

Tips: Tighten the mount after testing, then repeat the walk test. Check for branches, roof edges, and glare that may block the panel or lens. I’d avoid trusting a single “motion detected” notification; verify the recorded clip too. Fine-tuning takes patience, and the first framing may still need another adjustment.

How to Install a Solar CCTV Camera Step by Step - Test the System and Adjust the Camera Angle
Step Task What to Do What to Check
1 Choose the installation location Select a stable mounting point with a clear view of the area to monitor. Check that the solar panel can receive direct sunlight for several hours each day. Avoid deep shade, unstable surfaces, and locations where branches or other objects may block the camera or panel.
2 Check the equipment Confirm that the camera, solar panel, mounting hardware, cable, and any required battery or memory card are present. Read the supplied installation instructions. Inspect the housing, cable, and connectors for visible damage. Confirm that the equipment is intended for the expected outdoor conditions.
3 Prepare the camera Charge or connect the camera as instructed. Install the memory card if needed, then power on the camera and complete any initial setup before mounting. Check that the camera starts, records, and connects to the required network or viewing device, if applicable.
4 Mount the solar panel Fasten the panel to a secure surface using suitable fixings. Position it toward the sunniest available direction and adjust its tilt to reduce shading. Make sure the panel is firmly attached and its cable can reach the camera without being stretched, pinched, or exposed to avoidable damage.
5 Mount the camera Attach the camera to a solid wall, post, or other approved support. Keep it high enough to reduce easy tampering while maintaining the required view. Tighten the mounting hardware and confirm that the camera does not wobble. Follow the installation instructions for the camera’s specified mounting height and orientation.
6 Connect the solar panel Connect the panel cable to the camera or battery input as directed. Secure the cable along the mounting surface and use weather protection where specified. Check that connectors are fully seated and that the cable has no sharp bends, tension, or exposed sections that could collect water.
7 Test the system Power on the system and view the live image. Trigger a test recording or motion event, then review the saved footage and confirm that charging is indicated when sunlight is available. Verify the image, recording, notifications, and connection to the viewing device. Check the battery or charging status using the system’s display or app.
8 Adjust the camera angle Loosen the adjustment joint slightly and aim the camera so the area of interest is centered. Tighten the joint, then check the live view again. Keep the horizon level where practical. Check for obstructions, excessive sky in the frame, glare, and blind spots at the edges of the view.
9 Run a final check Walk through the monitored area to test motion detection. Confirm that the camera records the expected activity and that the solar panel remains unobstructed. Recheck all fixings and cable connections. Review the image during daylight and, if available, at night to confirm usable coverage.

FAQS

What should I inspect before mounting the camera?

Check the housing for cracks, loose seals, or moisture near the lens. Confirm that the battery charges and the camera records a test clip. Small checks matter.

How can I check the solar panel?

Look for chipped glass, bent framing, and a clean cable connector. Match its output to the camera’s specifications, not just the connector shape.

Which tools should I prepare?

Gather a drill, suitable fasteners, screwdriver, measuring tape, pencil, and level. Keep the instructions and cable clips nearby. Test-fit everything on the ground.

How do I choose a sunny panel location?

Observe sunlight across the roof or wall at different times. A spot bright at noon may stay shaded for much of the day. I might miss that on a quick glance.

What should I test after mounting the camera?

Check live view, motion alerts, night vision, and recording playback. Walk toward the entrance from several directions. Test it at dusk.

How can I tell if the solar panel performs well?

Compare the charging indicator on sunny and cloudy days. One afternoon is not enough to judge performance.

How should I adjust the camera angle?

Aim at the approach, not a wide stretch of empty pavement. Review footage from the distance where you need to recognize a visitor.

What can affect the recorded image?

Distance, motion, lighting, lens choice, branches, roof edges, and glare can all matter. A small angle change may help more than wider coverage.

Should I trust a motion alert by itself?

Check the recorded clip too. Tighten the mount after testing, then repeat the walk test. The first framing may still need work.

Conclusion

How To Install Solar Cctv Camera begins with choosing a suitable location. Look for a clear view of the area you want to monitor and check how much direct sunlight the solar panel can receive throughout the day. Before installation, inspect the camera, panel, cables, and mounting parts, and gather the tools needed to secure them safely.

Mount the camera where it can cover the desired area, then position the solar panel to receive strong sunlight without obstruction. Connect the components according to the supplied instructions and complete the camera’s setup, including its network connection and recording preferences. Finally, test the system in daylight and after dark, confirm that the camera is receiving power and capturing clear footage, and adjust its angle or panel position as needed. A careful final check helps ensure reliable operation and effective coverage.


Sophia

Sophia

Sophia is a dedicated marketing professional with an exceptional depth of knowledge about her company's products and services. With a keen understanding of market trends and customer needs, she crafts insightful blog posts that not only inform but also engage readers, enriching the company’s online......