How to Install the Best PTZ Solar Camera in 2026

Time:2026-11-19 Author:Sophia
0%

A PTZ solar camera can cover a driveway, garden, or outbuilding without a nearby power outlet. Its pan-and-tilt controls help you check different areas, while a solar panel can reduce routine charging. But good footage depends on more than camera features. Placement, sunlight, Wi-Fi strength, and a secure mount all matter. A shaded eave may protect the camera from rain, yet limit the panel’s daily exposure. Small choices count. No guesswork.

The question “How To Install Ptz Solar Camera” involves planning, mounting, setup, and testing—not just attaching a bracket. This guide explains how to choose a clear view, check the signal at the installation point, and position the panel for useful sun exposure. It also covers practical checks, such as confirming the camera’s live view before tightening every fastener and reviewing the manufacturer’s weatherproofing guidance. A few minutes of testing can reveal blind spots or a weak connection. Still, solar performance changes with seasons, shade, and local weather; no setup guarantees uninterrupted power. That limitation is worth considering before choosing a location. Follow the product instructions, use a stable ladder, and aim the lens only where you have permission to monitor. With careful preparation, installation can be safer and the resulting footage more dependable.
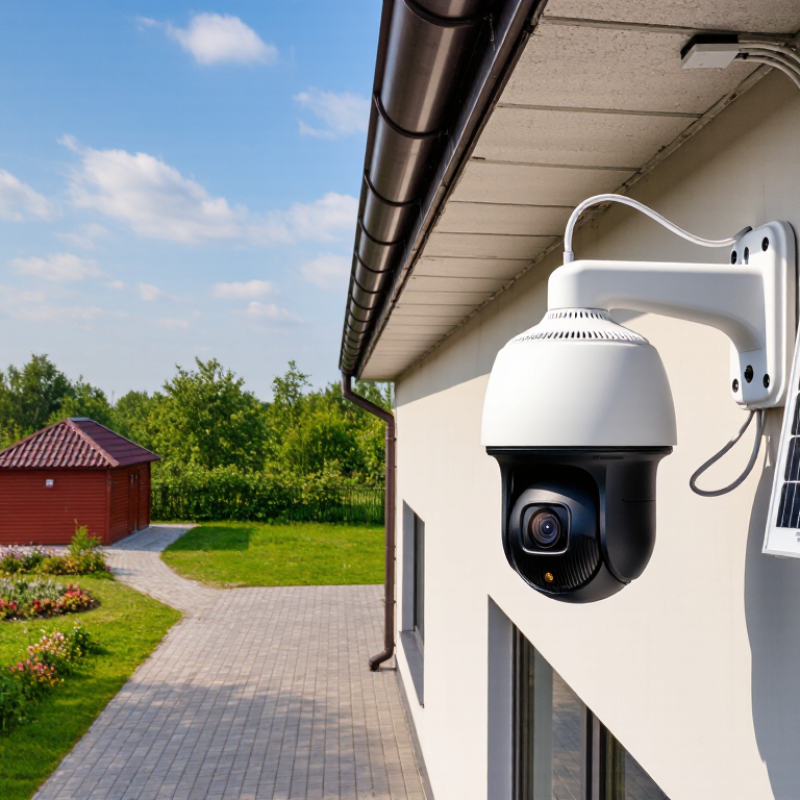
How to Install the Best PTZ Solar Camera in 2026

Assess the Installation Site and Define Camera Requirements

Before choosing a mounting point, walk the property at the hours when the camera will be used. Note entrances, driveways, gates, and areas hidden by parked vehicles or branches. Shade matters. A few hours of direct sunlight can make a major difference to solar charging, so check the proposed panel location across the day and through seasonal changes. If the camera and panel can be mounted separately, confirm the cable can reach without becoming exposed or strained.

Define what the camera must see before setting its height. A wide view may monitor a yard, while readable detail at a distant gate may require optical zoom and a closer position. PTZ movement helps inspect different directions, but it cannot show every area at once. Check it twice. Consider nighttime lighting, wind-driven movement, and whether the mounting surface feels solid; vibration can blur footage. Also confirm that Wi-Fi or cellular reception is usable at the exact mounting spot, not just indoors. Decide how footage will be stored and how often someone can clean the lens or adjust the panel. I would leave extra charging margin rather than plan around perfect sunshine. That assumption is easy to make—and easy to regret.

Select a PTZ Solar Camera and Verify Its Components

Choosing a PTZ solar camera starts with matching its power system to the site. Check the camera’s rated input, battery capacity, and solar-panel output against the manufacturer’s specifications. PTZ movement and night vision can draw more energy than a fixed camera, especially during cloudy weeks. Small details matter. Confirm that the panel cable reaches the planned mounting point without being stretched or pinched. Compare the connector shape and voltage requirements before connecting anything. A plug that fits is not proof of compatibility.

Lay out every component before installation: camera, panel, mounting brackets, fasteners, cable, seals, and any supplied antenna or storage card. Check every connector. Look for cracked housings, bent pins, missing screws, and damaged weather seals. Test the camera’s pan and tilt on the ground, then confirm the app can display a live view and record a short clip. I would not judge the system by image quality alone; a smooth daytime picture can hide weak night coverage or unreliable movement. That is an easy detail to overlook. Check the camera’s stated weather rating, too, and inspect how cables enter the housing. A rushed seal may seem fine on a sunny afternoon, but rain can reveal the mistake later.

How to Install the Best PTZ Solar Camera in 2026 - Select a PTZ Solar Camera and Verify Its Components

Component or Feature What to Check Before Purchase Installation Verification Acceptance Check
Camera resolution Confirm the stated native video resolution and whether recording uses that resolution. Review a daytime recording and inspect details at the intended monitoring distance. Recorded footage provides usable detail for the site; digital enlargement alone does not add image detail.
Pan and tilt movement Check the specified pan and tilt ranges, preset positions, and control method. Move the camera through its stated range and test each saved preset. The camera moves smoothly, covers the required viewing area, and returns reliably to its presets.
Zoom Determine whether the advertised zoom is optical, digital, or a combination. Test zoom at the actual distance and compare the resulting image with the wide view. The image remains sufficiently clear for the intended task; digital zoom may reduce apparent detail.
Solar panel Check the panel's rated output, connector, cable length, and compatibility with the camera. Mount the panel in an unshaded location and confirm that the camera reports charging. Panel output and local sunlight conditions are suitable for the camera's documented energy needs.
Rechargeable battery Verify battery capacity, charging requirements, and any published runtime conditions. Confirm the battery is recognized and monitor its charge level during normal camera use. Expected runtime accounts for PTZ movement, night illumination, network use, temperature, and available sunlight.
Outdoor weather protection Check the enclosure's ingress-protection rating and any limits stated in the installation instructions. Fit covers, seals, and cable connections as directed; position connectors to avoid water ingress. All openings are sealed correctly. An IP rating applies to the tested enclosure under specified conditions, not to incorrect installation.
Night vision Check the listed night-vision modes and any stated illumination distance. Test nighttime footage at the required distance, including the scene's darkest areas. Subjects remain sufficiently visible under actual site conditions; obstacles and reflective surfaces do not obscure the view.
Network connection Confirm supported Wi-Fi or cellular requirements, including compatible bands and service availability where applicable. Test live view, alerts, and remote PTZ control from the intended location. The connection is stable enough for the required video and control functions at the installed camera position.
Recording and storage Check supported local or cloud storage options, card compatibility, and any stated capacity limits. Make a test recording, play it back, and verify that time and date settings are correct. Footage can be retrieved successfully and the selected storage method meets the required retention needs.
Mounting hardware and cables Check that the package includes the required bracket, fasteners, solar cable, and seals for the planned installation. Secure the camera and panel to suitable surfaces, route cables safely, and check that the assembly does not wobble. Mounts are stable, cables are protected from damage, and the camera has an unobstructed view.

Selection note: Solar performance and battery runtime depend on camera settings, usage, weather, shading, and seasonal sunlight. Check the camera's documented power requirements and assess the installation site before choosing a panel and battery configuration.

Prepare the Mounting Location, Tools, and Safety Equipment

Before drilling, inspect the wall or pole for cracks, loose siding, and hidden wiring. Choose a firm mounting surface with a clear view across the area the camera must cover. Check the PTZ head’s full pan-and-tilt range; a nearby eave can block the view. Keep the solar panel in direct sunlight, and watch for shadows from branches at different times of day. A quick site check helps. Still, winter shade can be easy to underestimate.

Gather a tape measure, pencil, level, drill with suitable bits, compatible anchors, and a torque driver. Match fasteners to the actual surface; a masonry anchor is not a safe substitute for a wood screw. Set out eye protection, work gloves, and a stable ladder on firm, level ground.

The U.S. Bureau of Labor Statistics recorded 161 fatal occupational injuries involving ladders in 2022. That figure is a useful reminder to avoid reaching sideways or working in wind.

If the mounting point is beyond safe reach, ask a qualified installer rather than improvising.

Before climbing, confirm the camera, panel, and cables are within reach, and keep small parts in a pouch. Mark pilot holes, then pause to check level and clearance once more. I would recheck the panel’s sun exposure after mounting; an initially bright spot can lose light as foliage grows. That extra check is not glamorous, but it can prevent a frustrating repositioning.

Mount the Camera and Position the Solar Panel

Mount the camera where it can see the approach, not just the center of the yard. A position roughly 2.5 to 3 meters high often balances useful coverage with easy maintenance. Check the PTZ camera’s full movement range before drilling; nearby walls or gutters can block its view. Use anchors suited to the mounting surface, and keep the base level. A wobbly mount can make distant details harder to follow. Leave a gentle cable drip loop so rain runs away from the connection.

Tips: Aim the solar panel toward the strongest, least-shaded part of the sky. The best direction depends on your location, so watch the sun across the mounting area before fixing the bracket. Avoid spots shaded by branches, roof edges, or chimneys. A small test saves trouble.

After mounting, move the camera through its pan and tilt range, then check the live view from the places you want to monitor. Confirm that the panel receives several hours of direct light during the day, especially in seasons when the sun sits lower. Tighten the brackets after final adjustments, but do not force the joints. I have found that a location that looks sunny at noon can be shaded in the morning; check at different times if possible. Some positioning still involves compromise. Make a small adjustment, then review the view and charging status before calling the setup finished.

How to Install a PTZ Solar Camera in 2026: Position the Solar Panel

For a location at 35° north latitude, a common rule of thumb is to set a fixed solar panel near the local latitude angle, then adjust about 15° seasonally. Aim the panel toward the equator—south in the Northern Hemisphere—and avoid shade.

These are approximate starting angles, not guarantees of camera performance. Local roof angle, shading, and weather can affect solar charging; check the camera’s charging status after installation.

Configure the Camera, Test Its Functions, and Maintain It

Before mounting the camera, charge its battery fully and check the manual for setup requirements. Fix the unit to a rigid wall or pole; a loose mount can make footage shake when the camera turns. Place the solar panel where it receives several hours of direct sunlight, then angle it away from nearby branches and roof shadows. Small adjustments matter. Connect the camera to Wi-Fi near the router first, then test the signal at the final position. Take your time.

Use the app or control panel to set the time, motion zones, recording schedule, and alert sensitivity. Test pan, tilt, and zoom from the far end of the property, not just beside the camera. Walk across the detection area at different distances, and review the clips for missed movement or excessive alerts. Check the night image after dark. A bright porch light may create glare, so the first test may need repeating.

Inspect the live view and battery level after several days, especially following cloudy weather. Wipe dust and pollen from the solar panel with a soft, damp cloth, and check that the mount, cable, and weather seals remain secure. Keep the camera’s software current, but review update notes and settings afterward; an update can change familiar options. I would not assume one sunny afternoon proves the panel is positioned well. Recheck its output through changing weather.

FAQS

How do I choose a camera mounting location?

Walk the property when the camera will be used. Check entrances, driveways, gates, parked vehicles, and branches that may block the view.

How high should I mount the camera?

Around 2.5 to 3 meters often balances coverage and maintenance access. Check the live view from the areas you want to monitor.

Where should I position the solar panel?

Choose a spot with several hours of direct sunlight. Check for shadows from roof edges, chimneys, and branches at different times of day. Noon can be misleading.

Can the camera and panel be mounted separately?

Yes, if the cable reaches without strain or exposure. Leave a gentle drip loop so rain runs away from the connection.

What should I check before drilling?

Look for cracks, loose siding, and possible hidden wiring. Match the anchors to the wall or pole material. Check twice.

How can I make sure the camera has a clear view?

Test the full pan-and-tilt range before fixing the bracket. Nearby eaves or gutters can block movement, and PTZ cannot show every direction at once.

What tools and safety steps do I need?

Gather a tape measure, level, drill, suitable bits, compatible anchors, eye protection, and gloves. Use a stable ladder on firm ground, and avoid reaching sideways.

How do I check the setup after installation?

Tighten the brackets without forcing the joints. Review the live view and charging status, then check the panel again in morning light. Small adjustments may help.

What details are easy to overlook?

Wi-Fi or cellular reception can differ outdoors from indoors. Also consider lens cleaning and seasonal shade. I might still underestimate winter shadows.

Conclusion

Installing a PTZ solar camera successfully begins with evaluating the location and deciding what the camera needs to cover. Consider sunlight exposure, viewing angles, mounting strength, wireless connectivity, and the areas that require monitoring. Then choose a camera with suitable pan, tilt, zoom, and power capabilities, and check that its camera, solar panel, mounting hardware, and other included components are ready before starting.

This guide to How To Install Ptz Solar Camera explains how to prepare the mounting area, gather the necessary tools and safety equipment, and attach the camera and solar panel in positions that support a clear view and reliable charging. After installation, configure the camera and test its movement, image, connection, alerts, and solar power. Regularly clean the panel, inspect the mount, and review camera settings to help maintain dependable performance over time.


Sophia

Sophia

Sophia is a dedicated marketing professional with an exceptional depth of knowledge about her company's products and services. With a keen understanding of market trends and customer needs, she crafts insightful blog posts that not only inform but also engage readers, enriching the company’s online......