A Solar Camera Wifi system sounds simple: a panel, a camera, and a phone alert. In practice, reliable monitoring depends on details you can see on site: winter shade across the panel, a weak router signal at the gate, or a battery drained by repeated motion alerts. The International Energy Agency’s Renewables 2024 report records nearly 510 gigawatts of renewable capacity added worldwide in 2023, with solar PV providing about three-quarters. That growth makes solar power more familiar, but it does not guarantee a camera will stay online. Small details matter. IEA Executive Director Fatih Birol called solar “the new king of electricity markets around the world.” His comment describes the wider energy shift, not a promise about any single camera. That distinction matters.
This guide introduces ten practical checks before you buy. Start with real resolution and night footage, not just the headline number on the box. Check Wi-Fi compatibility, router distance, and whether the app shows signal strength. Compare panel output with battery capacity and your site’s usable sunlight. Review weather ratings, storage options, alert controls, and warranty terms. Then inspect mounting flexibility. A well-positioned panel may help, but nearby trees can steal afternoon sun. No specification sheet can fully reveal that.
A larger panel still cannot fix a weak Wi-Fi link. That is an easy mistake. The right model fits your site, not simply the longest feature list. These tips focus on evidence you can verify: sample footage, support documents, app requirements, and realistic power figures. A little skepticism helps.
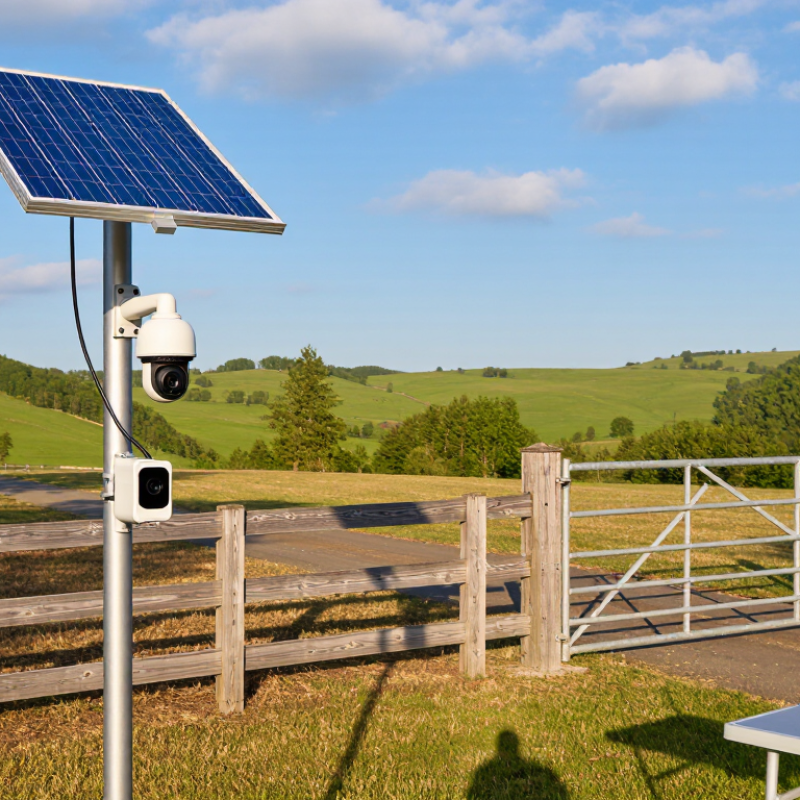
Resolution is useful only when it matches the area you need to monitor. A 1080p image contains about 2 million pixels; 4K contains roughly 8 million. That extra detail can help when enlarging a distant face or checking a label near a gate. More pixels help. They do not guarantee clarity. Lens quality, focus, movement, and low light can soften either image. A wide view also spreads pixels across more ground, so 4K may show less useful detail per person than expected.
Consider the distance from the camera to the spot that matters. A small entryway may be clear at 1080p, while a long driveway could benefit from 4K. Stand where the camera will be mounted and note the farthest point you need to recognize.
It is tempting to treat 4K as an automatic upgrade; that is not always sensible. Higher resolution may use more WiFi data and storage, and can affect a solar camera’s power needs depending on its settings. Check the camera’s real-world sample footage, especially at night, before deciding. I would still leave some room for doubt: a specification sheet cannot show every shadow, glare, or passing branch.
A solar WiFi camera needs a dependable connection where it will actually hang, not just beside your router. Before drilling, hold your phone at the planned mounting point and check the 2.4 GHz network signal. A few steps toward the house can make a surprising difference. Walls, metal siding, and dense foliage may weaken reception. A strong reading is helpful, but it is not a guarantee; weather and household traffic can affect performance.
Tip: Temporarily mount or hold the camera in place, then complete its setup and live-view test. Check the feed for several minutes. If it freezes, try a spot nearer the router or reposition the router before raising the camera permanently. Small changes matter.
Also confirm that your router supports the camera’s stated WiFi requirements. Some cameras connect only to 2.4 GHz, while a combined network may use the same name for both bands. Review the camera instructions and router settings; you may need to select or temporarily separate the 2.4 GHz network. Check the required security mode and password, too. Mesh systems can behave differently. I would not assume compatibility from a successful phone connection alone—phones often switch bands without making it obvious. Test the camera itself at the final location, and note any setup steps that feel unclear before tightening the mount.
A solar WiFi camera needs enough panel output to replace the energy it uses, not just a large-looking panel. Start with the camera’s daily watt-hours, including WiFi activity, motion alerts, night vision, and frequent live viewing. If the manufacturer lists only battery capacity, estimate daily use from runtime and check it against real operating conditions when possible. The estimate may be imperfect. Cold nights and weak signals can change power use.
Use NREL’s PVWatts calculator to estimate monthly solar production for your location, panel direction, and tilt. Its results describe modeled energy from a larger grid-connected system, so treat them as a sun-resource guide, not a direct promise for a small camera panel. Find the lowest-production month, then convert that estimate into an average daily figure. Allow for panel mismatch, wiring, shade, dirt, and charging losses. Weather gets a vote.
For a practical sizing check, divide the camera’s daily energy need by estimated daily sun hours, then add a safety margin for system losses. Also size the battery for cloudy days: multiply daily use by the number of backup days you want, then account for usable battery capacity. A neat calculation can still miss a tree’s afternoon shadow. Recheck the mounting spot through the day, and avoid relying on annual averages when winter sunlight is much weaker.
Motion detection should match the space, not just the camera’s advertised sensitivity. Passive infrared sensors can react to warm bodies, while image-based detection may classify people or vehicles. Test both near a gate and beside moving branches. Set activity zones and adjust sensitivity to reduce alerts from passing headlights. Small setup errors matter.
Night vision needs a real-world check. Infrared often shows monochrome footage; built-in lights may produce color but attract attention and use more power. Compare the stated night range with the distance to your doorway or driveway. Storage also changes what you can review: local cards avoid recurring fees, while remote storage can preserve clips if the camera is damaged. Check retention limits, encryption, account protection, and whether recordings remain accessible during WiFi outages.
Solar performance depends on placement. A shaded panel may not keep up with frequent recording, especially during cloudy weeks. Check battery and panel specifications, then monitor charge levels after installation. Verizon’s 2024 Data Breach Investigations Report found that 68% of breaches involved a human element, such as error or social engineering. That makes unique passwords and multifactor authentication practical safeguards. One caveat: detection labels are not proof. Review important clips yourself; false alerts still happen.
A solar WiFi camera may sit through months of rain, dust, and windblown grit. Check its weather rating before choosing a mounting spot. Under IEC 60529, IP65 means the enclosure is dust-tight and resists water jets under specified test conditions. Not submersible. That distinction matters: IP65 does not promise protection from a flooded yard or a pressure washer held close to the housing.
Look beyond the camera body. A solar panel, charging cable, or exposed connector may have a different rating, leaving a weak point in an otherwise sealed setup. Check the product documentation for the rating of each outdoor component. Inspect rubber covers and cable entry points, too. A loose port cover can let water in. Small details matter.
IP65 also says nothing about heat, cold, UV exposure, or how well seals hold up over time. Choose a position with good drainage, and avoid aiming the camera where roof runoff hits it directly. After installation, check the seals and connectors periodically, especially after moving the unit. The rating is useful, but it is not the whole story. A careful installation still takes a little judgment.
| Tip | What to Check | Useful Fact | Practical Action |
|---|---|---|---|
| 1. Confirm the IP rating | Look for an IP code tested under IEC 60529. | IP65 means dust-tight protection and protection against water jets from a nozzle; it does not mean the device can be submerged. | Check the rating in the product specifications or test documentation, not just in promotional images. |
| 2. Check which parts are covered | Verify the rating for the camera, solar panel, connectors, and any external power or antenna ports. | A rating for one component does not automatically apply to the complete camera-and-panel setup. | Confirm that the rating applies to the assembled configuration you plan to install. |
| 3. Inspect cable openings and seals | Look for sealed cable entries, intact gaskets, and weather-resistant connector covers. | Unsealed openings or incorrectly fitted covers can provide a path for dust or water. | Follow the installation instructions for tightening connectors and closing protective caps. |
| 4. Match protection to the exposure | Consider whether the site receives rain, wind-driven spray, cleaning jets, or standing water. | IP65 covers water jets under specified test conditions, but it is not an immersion rating. | Do not mount an IP65 camera where flooding or submersion is expected. |
| 5. Understand higher IP ratings | Compare the rating with the actual installation environment. | IP66 specifies protection against more powerful water jets than IP65; IP67 includes temporary immersion testing under specified conditions. | Choose a rating suited to the exposure, and check the manufacturer's test conditions for the exact product. |
| 6. Check operating temperature | Compare the stated operating range with local seasonal temperatures. | An IP rating describes protection against dust and water entry; it does not specify the device's operating temperature range. | Check the camera and battery temperature limits separately, especially for very hot or cold locations. |
| 7. Plan the mounting position | Assess roof edges, sheltered walls, direct spray, and places where water may collect. | Mounting can affect exposure even when a device has a weather-resistance rating. | Use the recommended mounting orientation and avoid locations where water can pool around seals or connectors. |
| 8. Check the solar panel's exposure | Confirm that the panel can be positioned in suitable sunlight without compromising its weather protection. | The panel and its cable connections may have different specifications from the camera. | Review each component's rating and installation guidance before placing the panel outdoors. |
| 9. Consider UV and corrosion separately | Look for information about materials, UV resistance, and corrosion resistance where relevant. | IEC 60529 IP ratings do not by themselves certify resistance to ultraviolet exposure, salt, or corrosion. | For coastal or high-sun locations, check the product documentation for those additional protections. |
| 10. Maintain seals over time | Check gaskets, covers, and cable entries during routine inspection. | Damage, dirt, or incorrect reassembly can compromise a seal. | Clean and inspect the unit as directed, and replace damaged sealing parts before continued outdoor use. |
No. 1080p has about 2 megapixels, while 4K has roughly 8. A small entryway may look clear at 1080p, but a long driveway may benefit from extra detail. Check sample footage before deciding.
Stand near the planned mounting spot and identify the farthest area you need to recognize. A wide view spreads pixels across more ground. More pixels do not guarantee a sharp image.
Try detection near a gate and beside moving branches. Adjust activity zones and sensitivity to limit alerts from passing headlights. False alerts still happen.
Compare the stated night range with the distance to your doorway or driveway. Infrared usually records in monochrome. Built-in lights can show color, but may attract attention and use more power.
Local cards avoid recurring fees. Remote storage may preserve clips if the camera is damaged. Check retention limits, encryption, account protection, and access during WiFi outages.
Not necessarily. Shade and cloudy weeks can reduce charging, especially with frequent recording. Check the panel and battery specifications, then watch charge levels after installation.
Under IEC 60529, IP65 means dust-tight and resistant to water jets under specified test conditions. Not submersible. It does not promise protection from flooding or a close pressure-washer spray.
Check the camera, panel, cable, and connectors for their individual weather ratings. Keep the unit away from roof runoff, inspect rubber covers, and recheck seals periodically. I still find ratings easy to overtrust.
Choosing a Solar Camera Wifi system starts with matching image resolution to the area you need to monitor. A 1080p camera provides about 2 megapixels, while 4K offers roughly 8 megapixels and can capture more detail across wider spaces. Before installation, test the 2.4 GHz Wi-Fi signal at the intended mounting point and confirm that the camera is compatible with your router.
For reliable operation, estimate local sunlight using NREL PVWatts sun-hour data, then choose solar panel and battery capacity that suit the site’s conditions and expected use. Compare motion detection, night vision, storage options, and security features to find a setup that fits your needs. Finally, check the weather rating: an IEC 60529 IP65 rating indicates that the enclosure is dust-tight and resistant to water jets, helping it withstand outdoor exposure.

Psennikow